
How to Build an AI-Powered Plugin or Widget for Your Clients
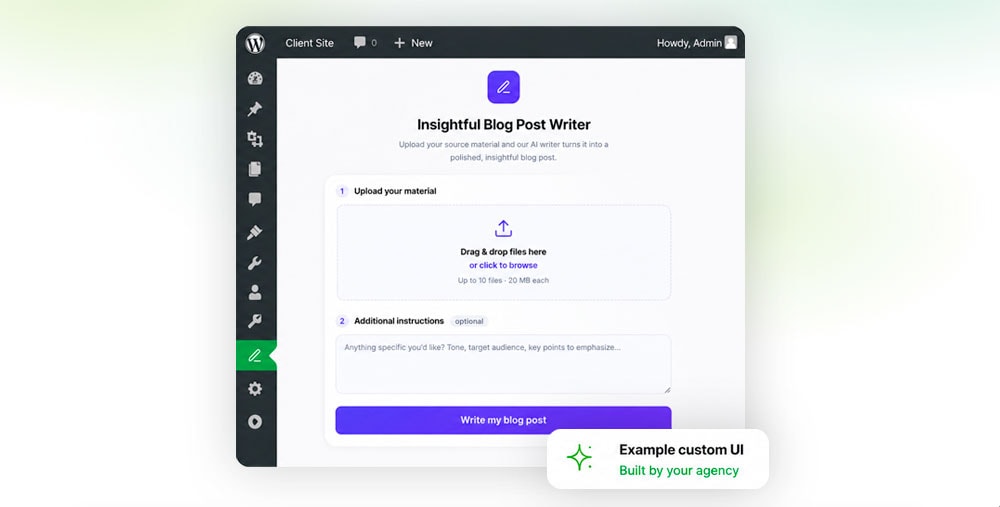
Agencies can now turn AI agents into client-facing tools inside WordPress. Instead of asking clients to work inside WP Godmode directly, you can expose a focused, branded interface through a custom plugin or dashboard widget.
That interface can let clients import or write blog posts, add team members, manage products, update content, or run any other workflow you define. The experience sits inside wp-admin, uses the agency’s white label branding, and gives the client a simple UI without exposing how the automation is powered behind the scenes.
The idea
Think of it as a controlled AI workspace for your client. The agency builds the agent, decides what it can do, defines the inputs it needs, and controls which WordPress users can access it. The client only sees the finished interface: a button, form, dashboard widget, or custom admin page that runs the workflow.
For example, an agency could create a Blog Importer agent that receives a Word document, turns it into a Gutenberg post, uploads or assigns a featured image, adds categories, suggests internal links, and prepares the article as a draft for review.
Before you start
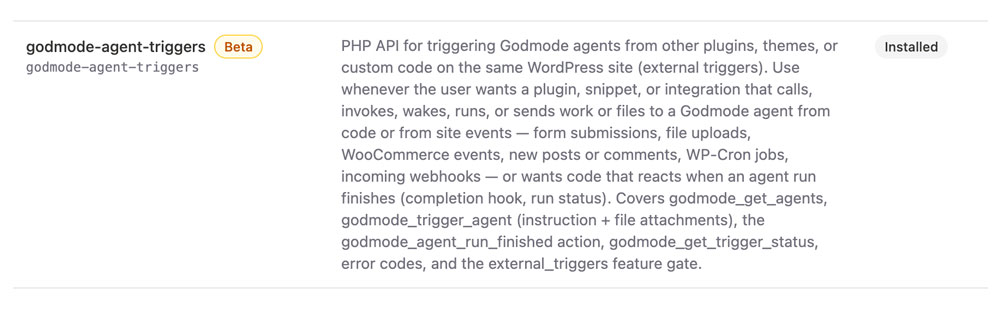
Before you build the client-facing UI, make sure the godmode-agent-triggers skill is installed under Godmode > Skills. This skill provides the API layer that lets plugins, dashboard widgets, snippets, or other custom code trigger a WP Godmode agent from inside the same WordPress site.
Step 1: Create the agent
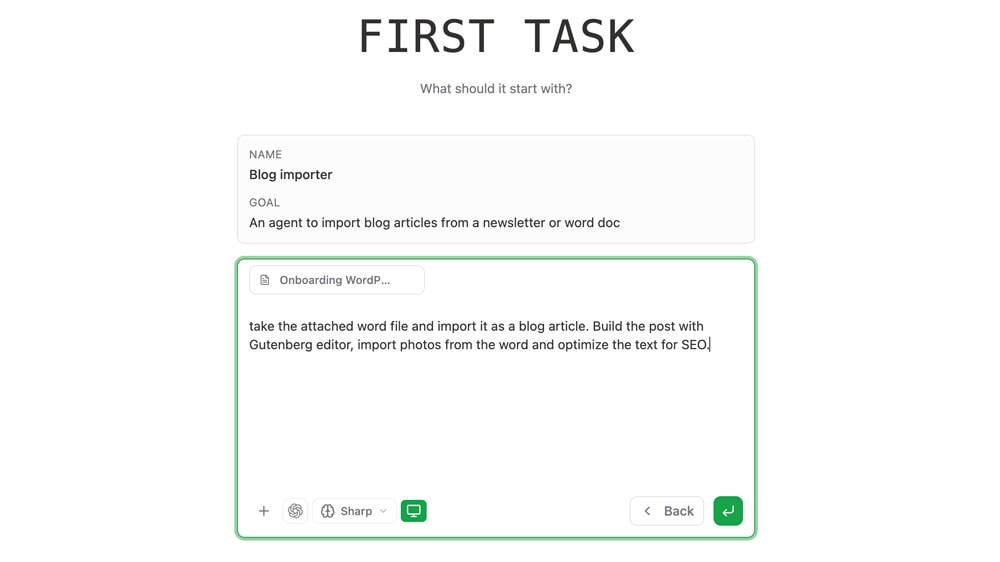
Start by creating the agent in WP Godmode. This is where the agency defines the actual workflow: what the agent should receive, what it should create or change, which rules it must follow, and how much control it should have. If you want to see that part in detail first, follow the tutorial on building a Word-to-WordPress AI agent.
- For a blog importer, define the accepted source material, such as Word files, notes, PDFs, or pasted text.
- Decide whether the agent should create drafts, update existing posts, or publish only after approval.
- Specify formatting rules for Gutenberg blocks, headings, excerpts, categories, tags, and internal links.
- Define how featured images should be handled: uploaded by the client, selected from the Media Library, or generated separately.
- Set guardrails for tone, SEO structure, brand wording, and review steps.
The agent is the engine. The client-facing plugin or widget is only the interface that triggers it.
Step 2: Build the client-facing UI
Once the agent works, switch to the chat in WP Godmode and ask it to build the interface around that agent. A simple instruction can be enough:
Build a plugin or dashboard widget that triggers my agent “Blog Importer”.
You can make the instruction more specific if the client needs extra fields or a more guided workflow. For example, you might ask for fields like target keyword, audience, tone, source file upload, category selection, or notes for the editor.
You can also provide UI direction directly in the chat: button labels, helper text, success messages, agency branding, colors, layout preferences, or a screenshot of a design you want the interface to match.
Step 3: Decide who can use it
The interface can be restricted to specific roles or users. For example, the agency might expose the Blog Importer only to editors, while administrators retain the full configuration and review workflow.
- Show the widget only to editors.
- Limit product tools to shop managers.
- Give marketing users access to content workflows only.
- Keep technical settings hidden from the client.
This keeps the client experience simple and reduces the chance of accidental changes outside the intended workflow.
Step 4: White label the experience
The plugin or dashboard widget can use the agency’s own branding. The client sees a polished tool inside their WordPress admin area, with the agency’s wording, design, and workflow. They do not need to understand that WP Godmode is handling the agent execution in the background.
That makes the feature feel like part of the agency’s service, not a separate AI product bolted onto the site.
What you can build
- A blog post importer that turns client documents into Gutenberg drafts.
- A writing assistant that creates articles from a short brief.
- A WooCommerce product manager for descriptions, metadata, and product updates.
- A team member manager that adds staff profiles from a structured form.
- A content maintenance tool that updates pages, FAQs, or documentation entries.
- A support workflow that turns client notes into tasks, drafts, or admin actions.
Why this matters for agencies
This turns AI from a chat interface into a productized client feature. The agency owns the workflow, the permissions, the branding, and the implementation. The client gets a focused tool that does one job well.
For recurring client work, that is the real leverage. You can package repeatable processes into simple WordPress admin tools and keep improving the underlying agent without retraining the client every time.
That’s it
Create the agent. Ask WP Godmode to build the plugin or dashboard widget. Add any client-specific fields, permissions, wording, branding, or screenshot-based design direction. Then give the client a clean interface that runs the workflow from inside WordPress.
Voilà. Your agency now has a white label AI-powered plugin or widget for client workflows.